


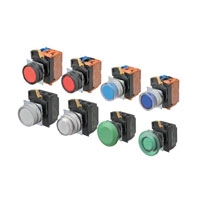
 22-mm dia. Pushbutton Switches. Control panel miniaturization through a more compact design and modified wiring direction. Addition of Push-In Plus terminal blocks for easy wiring.
Button Colors

List of Models

Model Number Structure
Model Number Legend
Shipped as a set that includes the Operation Unit, LED Lamp (lighted models only), Mounting Collar, Contact Block, and Lighting Unit (lighted models only).
For information on combinations, refer to Ordering Information on below.
Model Numbers for Sets

Ordering Information
Model Numbers for Sets
Shipped as a set that includes the Operation Unit, LED Lamp (lighted models only), Mounting Collar, Contact Block, and Lighting Unit (lighted models only).
Non-lighted, Flat Switches
|
Appearance |
Contacts |
Momentary action (self-resetting) |
(4)(4) |
(7)(7)(7) |
|
Model |
||||
|
Plastic bezels |
1 |
A22NN-BNM-(4)(4)A-G(7)(7)(7)-NN |
NR: Opaque, red |
100 |
|
A22NN-BNM-(4)(4)A-P(7)(7)(7)-NN |
||||
|
2 |
A22NN-BNM-(4)(4)A-G(7)(7)(7)-NN |
101 |
||
|
A22NN-BNM-(4)(4)A-P(7)(7)(7)-NN |
||||
|
3 |
A22NN-BNM-(4)(4)A-G(7)(7)(7)-NN |
111 |
||
|
A22NN-BNM-(4)(4)A-P(7)(7)(7)-NN |
||||
|
Brushed metal |
1 |
A22NN-MNM-(4)(4)A-G(7)(7)(7)-NN |
100 |
|
|
A22NN-MNM-(4)(4)A-P(7)(7)(7)-NN |
||||
|
2 |
A22NN-MNM-(4)(4)A-G(7)(7)(7)-NN |
101 |
||
|
A22NN-MNM-(4)(4)A-P(7)(7)(7)-NN |
||||
|
3 |
A22NN-MNM-(4)(4)A-G(7)(7)(7)-NN |
111 |
||
|
A22NN-MNM-(4)(4)A-P(7)(7)(7)-NN |
||||
|
Appearance |
Contacts |
Alternate action (self-holding) |
(4)(4) |
(7)(7)(7) |
|
Model |
||||
|
Plastic bezels |
1 |
A22NN-BNA-(4)(4)A-G(7)(7)(7)-NN |
NR: Opaque, red |
100 |
|
A22NN-BNA-(4)(4)A-P(7)(7)(7)-NN |
||||
|
2 |
A22NN-BNA-(4)(4)A-G(7)(7)(7)-NN |
101 |
||
|
A22NN-BNA-(4)(4)A-P(7)(7)(7)-NN |
||||
|
3 |
A22NN-BNA-(4)(4)A-G(7)(7)(7)-NN |
111 |
||
|
A22NN-BNA-(4)(4)A-P(7)(7)(7)-NN |
||||
|
Brushed metal |
1 |
A22NN-MNA-(4)(4)A-G(7)(7)(7)-NN |
100 |
|
|
A22NN-MNA-(4)(4)A-P(7)(7)(7)-NN |
||||
|
2 |
A22NN-MNA-(4)(4)A-G(7)(7)(7)-NN |
101 |
||
|
A22NN-MNA-(4)(4)A-P(7)(7)(7)-NN |
||||
|
3 |
A22NN-MNA-(4)(4)A-G(7)(7)(7)-NN |
111 |
||
|
A22NN-MNA-(4)(4)A-P(7)(7)(7)-NN |


Lighted, Flat Switches
|
Appearance |
Con- |
Momentary action |
(4)(4) |
(7)(7)(7) |
(8) |
(9) |
|
Model |
||||||
|
Plastic bezels |
1 |
A22NL-BNM- |
TR: Transparent, red |
100 |
R: Red |
A: 6 VAC/DC |
|
A22NL-BNM- |
||||||
|
2 |
A22NL-BNM- |
101 |
||||
|
A22NL-BNM- |
||||||
|
Brushed metal |
1 |
A22NL-MNM- |
100 |
|||
|
A22NL-MNM- |
||||||
|
2 |
A22NL-MNM- |
101 |
||||
|
A22NL-MNM- |
||||||
|
Appearance |
Con- |
Alternate action |
(4)(4) |
(7)(7)(7) |
(8) |
(9) |
|
Model |
||||||
|
Plastic bezels |
1 |
A22NL-BNA- |
TR: Transparent, red |
100 |
R: Red |
A: 6 VAC/DC |
|
A22NL-BNA- |
||||||
|
2 |
A22NL-BNA- |
101 |
||||
|
A22NL-BNA- |
||||||
|
Brushed metal |
1 |
A22NL-MNA- |
100 |
|||
|
A22NL-MNA- |
||||||
|
2 |
A22NL-MNA- |
101 |
||||
|
A22NL-MNA- |


Note: Normally, the Button and LED Lamp with the same color are combined.
However, opaque white is available by combining a white Button and yellow LED. A22N[]-[][][]-TWA-[][][][]-Y[]
Non-lighted, Projected Switches
|
Appearance |
Contacts |
Momentary action (self-resetting) |
(4)(4) |
(7)(7)(7) |
|
Model |
||||
|
Plastic bezels |
1 |
A22NN-BPM-(4)(4)A-G(7)(7)(7)-NN |
NR: Opaque, red |
100 |
|
A22NN-BPM-(4)(4)A-P(7)(7)(7)-NN |
||||
|
2 |
A22NN-BPM-(4)(4)A-G(7)(7)(7)-NN |
101 |
||
|
A22NN-BPM-(4)(4)A-P(7)(7)(7)-NN |
||||
|
3 |
A22NN-BPM-(4)(4)A-G(7)(7)(7)-NN |
111 |
||
|
A22NN-BPM-(4)(4)A-P(7)(7)(7)-NN |
||||
|
Brushed metal |
1 |
A22NN-MPM-(4)(4)A-G(7)(7)(7)-NN |
100 |
|
|
A22NN-MPM-(4)(4)A-P(7)(7)(7)-NN |
||||
|
2 |
A22NN-MPM-(4)(4)A-G(7)(7)(7)-NN |
101 |
||
|
A22NN-MPM-(4)(4)A-P(7)(7)(7)-NN |
||||
|
3 |
A22NN-MPM-(4)(4)A-G(7)(7)(7)-NN |
111 |
||
|
A22NN-MPM-(4)(4)A-P(7)(7)(7)-NN |
||||
|
Appearance |
Contacts |
Alternate action (self-holding) |
(4)(4) |
(7)(7)(7) |
|
Model |
||||
|
Plastic bezels |
1 |
A22NN-BPA-(4)(4)A-G(7)(7)(7)-NN |
NR: Opaque, red |
100 |
|
A22NN-BPA-(4)(4)A-P(7)(7)(7)-NN |
||||
|
2 |
A22NN-BPA-(4)(4)A-G(7)(7)(7)-NN |
101 |
||
|
A22NN-BPA-(4)(4)A-P(7)(7)(7)-NN |
||||
|
3 |
A22NN-BPA-(4)(4)A-G(7)(7)(7)-NN |
111 |
||
|
A22NN-BPA-(4)(4)A-P(7)(7)(7)-NN |
||||
|
Brushed metal |
1 |
A22NN-MPA-(4)(4)A-G(7)(7)(7)-NN |
100 |
|
|
A22NN-MPA-(4)(4)A-P(7)(7)(7)-NN |
||||
|
2 |
A22NN-MPA-(4)(4)A-G(7)(7)(7)-NN |
101 |
||
|
A22NN-MPA-(4)(4)A-P(7)(7)(7)-NN |
||||
|
3 |
A22NN-MPA-(4)(4)A-G(7)(7)(7)-NN |
111 |
||
|
A22NN-MPA-(4)(4)A-P(7)(7)(7)-NN |


Lighted, Projected Switches
|
Appearance |
Con- |
Momentary action |
(4)(4) |
(7)(7)(7) |
(8) |
(9) |
|
Model |
||||||
|
Plastic bezels |
1 |
A22NL-BPM- |
TR: Transparent, red |
100 |
R: Red |
A: 6 VAC/DC |
|
A22NL-BPM- |
||||||
|
2 |
A22NL-BPM- |
101 |
||||
|
A22NL-BPM- |
||||||
|
Brushed metal |
1 |
A22NL-MPM- |
100 |
|||
|
A22NL-MPM- |
||||||
|
2 |
A22NL-MPM- |
101 |
||||
|
A22NL-MPM- |
||||||
|
Appearance |
Con- |
Alternate action |
(4)(4) |
(7)(7)(7) |
(8) |
(9) |
|
Model |
||||||
|
Plastic bezels |
1 |
A22NL-BPA- |
TR: Transparent, red |
100 |
R: Red |
A: 6 VAC/DC |
|
A22NL-BPA- |
||||||
|
2 |
A22NL-BPA- |
101 |
||||
|
A22NL-BPA- |
||||||
|
Brushed metal |
1 |
A22NL-MPA- |
100 |
|||
|
A22NL-MPA- |
||||||
|
2 |
A22NL-MPA- |
101 |
||||
|
A22NL-MPA- |


Note: Normally, the Button and LED Lamp with the same color are combined.
However, opaque white is available by combining a white Button and yellow LED. A22N[]-[][][]-TWA-[][][][]-Y[]
Non-lighted, Full-guard Switches
|
Appearance |
Contacts |
Momentary action (self-resetting) |
(4)(4) |
(7)(7)(7) |
|
Model |
||||
|
Plastic bezels |
1 |
A22NN-BGM-(4)(4)A-G(7)(7)(7)-NN |
NR: Opaque, red |
100 |
|
A22NN-BGM-(4)(4)A-P(7)(7)(7)-NN |
||||
|
2 |
A22NN-BGM-(4)(4)A-G(7)(7)(7)-NN |
101 |
||
|
A22NN-BGM-(4)(4)A-P(7)(7)(7)-NN |
||||
|
3 |
A22NN-BGM-(4)(4)A-G(7)(7)(7)-NN |
111 |
||
|
A22NN-BGM-(4)(4)A-P(7)(7)(7)-NN |
||||
|
Brushed metal |
1 |
A22NN-MGM-(4)(4)A-G(7)(7)(7)-NN |
100 |
|
|
A22NN-MGM-(4)(4)A-P(7)(7)(7)-NN |
||||
|
2 |
A22NN-MGM-(4)(4)A-G(7)(7)(7)-NN |
101 |
||
|
A22NN-MGM-(4)(4)A-P(7)(7)(7)-NN |
||||
|
3 |
A22NN-MGM-(4)(4)A-G(7)(7)(7)-NN |
111 |
||
|
A22NN-MGM-(4)(4)A-P(7)(7)(7)-NN |
||||
|
Appearance |
Contacts |
Alternate action (self-holding) |
(4)(4) |
(7)(7)(7) |
|
Model |
||||
|
Plastic bezels |
1 |
A22NN-BGA-(4)(4)A-G(7)(7)(7)-NN |
NR: Opaque, red |
100 |
|
A22NN-BGA-(4)(4)A-P(7)(7)(7)-NN |
||||
|
2 |
A22NN-BGA-(4)(4)A-G(7)(7)(7)-NN |
101 |
||
|
A22NN-BGA-(4)(4)A-P(7)(7)(7)-NN |
||||
|
3 |
A22NN-BGA-(4)(4)A-G(7)(7)(7)-NN |
111 |
||
|
A22NN-BGA-(4)(4)A-P(7)(7)(7)-NN |
||||
|
Brushed metal |
1 |
A22NN-MGA-(4)(4)A-G(7)(7)(7)-NN |
100 |
|
|
A22NN-MGA-(4)(4)A-P(7)(7)(7)-NN |
||||
|
2 |
A22NN-MGA-(4)(4)A-G(7)(7)(7)-NN |
101 |
||
|
A22NN-MGA-(4)(4)A-P(7)(7)(7)-NN |
||||
|
3 |
A22NN-MGA-(4)(4)A-G(7)(7)(7)-NN |
111 |
||
|
A22NN-MGA-(4)(4)A-P(7)(7)(7)-NN |


Lighted, Full-guard Switches
|
Appearance |
Con- |
Momentary action |
(4)(4) |
(7)(7)(7) |
(8) |
(9) |
|
Model |
||||||
|
Plastic bezels |
1 |
A22NL-BGM- |
TR: Transparent, red |
100 |
R: Red |
A: 6 VAC/DC |
|
A22NL-BGM- |
||||||
|
2 |
A22NL-BGM- |
101 |
||||
|
A22NL-BGM- |
||||||
|
Brushed metal |
1 |
A22NL-MGM- |
100 |
|||
|
A22NL-MGM- |
||||||
|
2 |
A22NL-MGM- |
101 |
||||
|
A22NL-MGM- |
||||||
|
Appearance |
Con- |
Alternate action |
(4)(4) |
(7)(7)(7) |
(8) |
(9) |
|
Model |
||||||
|
Plastic bezels |
1 |
A22NL-BGA- |
TR: Transparent, red |
100 |
R: Red |
A: 6 VAC/DC |
|
A22NL-BGA- |
||||||
|
2 |
A22NL-BGA- |
101 |
||||
|
A22NL-BGA- |
||||||
|
Brushed metal |
1 |
A22NL-MGA- |
100 |
|||
|
A22NL-MGA- |
||||||
|
2 |
A22NL-MGA- |
101 |
||||
|
A22NL-MGA- |


Note: Normally, the Button and LED Lamp with the same color are combined.
However, opaque white is available by combining a white Button and yellow LED. A22N[]-[][][]-TWA-[][][][]-Y[]
Non-lighted, Mushroom Switches
|
Appearance |
Contacts |
Momentary action (self-resetting) |
(4)(4) |
(7)(7)(7) |
|
Model |
||||
|
Plastic bezels |
1 |
A22NN-BMM-(4)(4)A-G(7)(7)(7)-NN |
NR: Opaque, red |
100 |
|
A22NN-BMM-(4)(4)A-P(7)(7)(7)-NN |
||||
|
2 |
A22NN-BMM-(4)(4)A-G(7)(7)(7)-NN |
101 |
||
|
A22NN-BMM-(4)(4)A-P(7)(7)(7)-NN |
||||
|
3 |
A22NN-BMM-(4)(4)A-G(7)(7)(7)-NN |
111 |
||
|
A22NN-BMM-(4)(4)A-P(7)(7)(7)-NN |
||||
|
Brushed metal |
1 |
A22NN-MMM-(4)(4)A-G(7)(7)(7)-NN |
100 |
|
|
A22NN-MMM-(4)(4)A-P(7)(7)(7)-NN |
||||
|
2 |
A22NN-MMM-(4)(4)A-G(7)(7)(7)-NN |
101 |
||
|
A22NN-MMM-(4)(4)A-P(7)(7)(7)-NN |
||||
|
3 |
A22NN-MMM-(4)(4)A-G(7)(7)(7)-NN |
111 |
||
|
A22NN-MMM-(4)(4)A-P(7)(7)(7)-NN |
||||
|
Appearance |
Contacts |
Alternate action (self-holding) |
(4)(4) |
(7)(7)(7) |
|
Model |
||||
|
Plastic bezels |
1 |
A22NN-BMA-(4)(4)A-G(7)(7)(7)-NN |
NR: Opaque, red |
100 |
|
A22NN-BMA-(4)(4)A-P(7)(7)(7)-NN |
||||
|
2 |
A22NN-BMA-(4)(4)A-G(7)(7)(7)-NN |
101 |
||
|
A22NN-BMA-(4)(4)A-P(7)(7)(7)-NN |
||||
|
3 |
A22NN-BMA-(4)(4)A-G(7)(7)(7)-NN |
111 |
||
|
A22NN-BMA-(4)(4)A-P(7)(7)(7)-NN |
||||
|
Brushed metal |
1 |
A22NN-MMA-(4)(4)A-G(7)(7)(7)-NN |
100 |
|
|
A22NN-MMA-(4)(4)A-P(7)(7)(7)-NN |
||||
|
2 |
A22NN-MMA-(4)(4)A-G(7)(7)(7)-NN |
101 |
||
|
A22NN-MMA-(4)(4)A-P(7)(7)(7)-NN |
||||
|
3 |
A22NN-MMA-(4)(4)A-G(7)(7)(7)-NN |
111 |
||
|
A22NN-MMA-(4)(4)A-P(7)(7)(7)-NN |


Lighted, Mushroom Switches
|
Appearance |
Con- |
Momentary action |
(4)(4) |
(7)(7)(7) |
(8) |
(9) |
|
Model |
||||||
|
Plastic bezels |
1 |
A22NL-BMM- |
TR: Transparent, red |
100 |
R: Red |
A: 6 VAC/DC |
|
A22NL-BMM- |
||||||
|
2 |
A22NL-BMM- |
101 |
||||
|
A22NL-BMM- |
||||||
|
Brushed metal |
1 |
A22NL-MMM- |
100 |
|||
|
A22NL-MMM- |
||||||
|
2 |
A22NL-MMM- |
101 |
||||
|
A22NL-MMM- |
||||||
|
Appearance |
Con- |
Alternate action |
(4)(4) |
(7)(7)(7) |
(8) |
(9) |
|
Model |
||||||
|
Plastic bezels |
1 |
A22NL-BMA- |
TR: Transparent, red |
100 |
R: Red |
A: 6 VAC/DC |
|
A22NL-BMA- |
||||||
|
2 |
A22NL-BMA- |
101 |
||||
|
A22NL-BMA- |
||||||
|
Brushed metal |
1 |
A22NL-MMA- |
100 |
|||
|
A22NL-MMA- |
||||||
|
2 |
A22NL-MMA- |
101 |
||||
|
A22NL-MMA- |


Note: Normally, the Button and LED Lamp with the same color are combined.
However, opaque white is available by combining a white Button and yellow LED. A22N[]-[][][]-TWA-[][][][]-Y[]
Switch Structure
You can order Operation Units, LED Lamps (lighted models only), Mounting Collars, Contact Blocks, and Lighting Units (lighted models only) separately. Use them in combination for models that are not available as assembled Switches. They can also be used as inventory for maintenance parts.

Subassemblies
You can order Operation Units, LED Lamps (lighted models only), Mounting Collars, Contact Blocks, and Lighting Units (lighted models only) separately. Use them in combination for models that are not available as assembled Switches. They can also be used as inventory for maintenance parts.
Operation Units
|
Bezel material and button shape |
Plastic, flat |
|||
|
|
||||
|
Switch Action |
Momentary |
Alternate |
||
|
Lighted/non-lighted |
Transparency |
Color |
Model |
Model |
|
Non-lighted |
Opaque |
Red |
A22NZ-BNM-NRA |
A22NZ-BNA-NRA |
|
Opaque |
Green |
A22NZ-BNM-NGA |
A22NZ-BNA-NGA |
|
|
Opaque |
Yellow |
A22NZ-BNM-NYA |
A22NZ-BNA-NYA |
|
|
Opaque |
White |
A22NZ-BNM-NWA |
A22NZ-BNA-NWA |
|
|
Opaque |
Blue |
A22NZ-BNM-NAA |
A22NZ-BNA-NAA |
|
|
Opaque |
Black |
A22NZ-BNM-NBA |
A22NZ-BNA-NBA |
|
|
Lighted |
Transparent |
Red |
A22NZ-BNM-TRA |
A22NZ-BNA-TRA |
|
Transparent |
Green |
A22NZ-BNM-TGA |
A22NZ-BNA-TGA |
|
|
Transparent |
Yellow |
A22NZ-BNM-TYA |
A22NZ-BNA-TYA |
|
|
Transparent |
White |
A22NZ-BNM-TWA |
A22NZ-BNA-TWA |
|
|
Transparent |
Blue |
A22NZ-BNM-TAA |
A22NZ-BNA-TAA |
|
|
Transparent |
Orange |
A22NZ-BNM-TOA |
A22NZ-BNA-TOA |
|
|
Bezel material and button shape |
Plastic, projected |
|||
|
|
||||
|
Switch Action |
Momentary |
Alternate |
||
|
Lighted/non-lighted |
Transparency |
Color |
Model |
Model |
|
Non-lighted |
Opaque |
Red |
A22NZ-BPM-NRA |
A22NZ-BPA-NRA |
|
Opaque |
Green |
A22NZ-BPM-NGA |
A22NZ-BPA-NGA |
|
|
Opaque |
Yellow |
A22NZ-BPM-NYA |
A22NZ-BPA-NYA |
|
|
Opaque |
White |
A22NZ-BPM-NWA |
A22NZ-BPA-NWA |
|
|
Opaque |
Blue |
A22NZ-BPM-NAA |
A22NZ-BPA-NAA |
|
|
Opaque |
Black |
A22NZ-BPM-NBA |
A22NZ-BPA-NBA |
|
|
Lighted |
Transparent |
Red |
A22NZ-BPM-TRA |
A22NZ-BPA-TRA |
|
Transparent |
Green |
A22NZ-BPM-TGA |
A22NZ-BPA-TGA |
|
|
Transparent |
Yellow |
A22NZ-BPM-TYA |
A22NZ-BPA-TYA |
|
|
Transparent |
White |
A22NZ-BPM-TWA |
A22NZ-BPA-TWA |
|
|
Transparent |
Blue |
A22NZ-BPM-TAA |
A22NZ-BPA-TAA |
|
|
Transparent |
Orange |
A22NZ-BPM-TOA |
A22NZ-BPA-TOA |
|


|
Bezel material and button shape |
Plastic, full-guard |
|||
|
|
||||
|
Switch Action |
Momentary |
Alternate |
||
|
Lighted/non-lighted |
Transparency |
Color |
Model |
Model |
|
Non-lighted |
Opaque |
Red |
A22NZ-BGM-NRA |
A22NZ-BGA-NRA |
|
Opaque |
Green |
A22NZ-BGM-NGA |
A22NZ-BGA-NGA |
|
|
Opaque |
Yellow |
A22NZ-BGM-NYA |
A22NZ-BGA-NYA |
|
|
Opaque |
White |
A22NZ-BGM-NWA |
A22NZ-BGA-NWA |
|
|
Opaque |
Blue |
A22NZ-BGM-NAA |
A22NZ-BGA-NAA |
|
|
Opaque |
Black |
A22NZ-BGM-NBA |
A22NZ-BGA-NBA |
|
|
Lighted |
Transparent |
Red |
A22NZ-BGM-TRA |
A22NZ-BGA-TRA |
|
Transparent |
Green |
A22NZ-BGM-TGA |
A22NZ-BGA-TGA |
|
|
Transparent |
Yellow |
A22NZ-BGM-TYA |
A22NZ-BGA-TYA |
|
|
Transparent |
White |
A22NZ-BGM-TWA |
A22NZ-BGA-TWA |
|
|
Transparent |
Blue |
A22NZ-BGM-TAA |
A22NZ-BGA-TAA |
|
|
Transparent |
Orange |
A22NZ-BGM-TOA |
A22NZ-BGA-TOA |
|
|
Bezel material and button shape |
Plastic, mushroom |
|||
|
|
||||
|
Switch Action |
Momentary |
Alternate |
||
|
Lighted/non-lighted |
Transparency |
Color |
Model |
Model |
|
Non-lighted |
Opaque |
Red |
A22NZ-BMM-NRA |
A22NZ-BMA-NRA |
|
Opaque |
Green |
A22NZ-BMM-NGA |
A22NZ-BMA-NGA |
|
|
Opaque |
Yellow |
A22NZ-BMM-NYA |
A22NZ-BMA-NYA |
|
|
Opaque |
White |
A22NZ-BMM-NWA |
A22NZ-BMA-NWA |
|
|
Opaque |
Blue |
A22NZ-BMM-NAA |
A22NZ-BMA-NAA |
|
|
Opaque |
Black |
A22NZ-BMM-NBA |
A22NZ-BMA-NBA |
|
|
Lighted |
Transparent |
Red |
A22NZ-BMM-TRA |
A22NZ-BMA-TRA |
|
Transparent |
Green |
A22NZ-BMM-TGA |
A22NZ-BMA-TGA |
|
|
Transparent |
Yellow |
A22NZ-BMM-TYA |
A22NZ-BMA-TYA |
|
|
Transparent |
White |
A22NZ-BMM-TWA |
A22NZ-BMA-TWA |
|
|
Transparent |
Blue |
A22NZ-BMM-TAA |
A22NZ-BMA-TAA |
|
|
Transparent |
Orange |
A22NZ-BMM-TOA |
A22NZ-BMA-TOA |
|


|
Bezel material and button shape |
Brushed metal, flat |
|||
|
|
||||
|
Switch Action |
Momentary |
Alternate |
||
|
Lighted/non-lighted |
Transparency |
Color |
Model |
Model |
|
Non-lighted |
Opaque |
Red |
A22NZ-MNM-NRA |
A22NZ-MNA-NRA |
|
Opaque |
Green |
A22NZ-MNM-NGA |
A22NZ-MNA-NGA |
|
|
Opaque |
Yellow |
A22NZ-MNM-NYA |
A22NZ-MNA-NYA |
|
|
Opaque |
White |
A22NZ-MNM-NWA |
A22NZ-MNA-NWA |
|
|
Opaque |
Blue |
A22NZ-MNM-NAA |
A22NZ-MNA-NAA |
|
|
Opaque |
Black |
A22NZ-MNM-NBA |
A22NZ-MNA-NBA |
|
|
Lighted |
Transparent |
Red |
A22NZ-MNM-TRA |
A22NZ-MNA-TRA |
|
Transparent |
Green |
A22NZ-MNM-TGA |
A22NZ-MNA-TGA |
|
|
Transparent |
Yellow |
A22NZ-MNM-TYA |
A22NZ-MNA-TYA |
|
|
Transparent |
White |
A22NZ-MNM-TWA |
A22NZ-MNA-TWA |
|
|
Transparent |
Blue |
A22NZ-MNM-TAA |
A22NZ-MNA-TAA |
|
|
Transparent |
Orange |
A22NZ-MNM-TOA |
A22NZ-MNA-TOA |
|
|
Bezel material and button shape |
Brushed metal, flat |
|||
|
|
||||
|
Switch Action |
Momentary |
Alternate |
||
|
Lighted/non-lighted |
Transparency |
Color |
Model |
Model |
|
Non-lighted |
Opaque |
Red |
A22NZ-MPM-NRA |
A22NZ-MPA-NRA |
|
Opaque |
Green |
A22NZ-MPM-NGA |
A22NZ-MPA-NGA |
|
|
Opaque |
Yellow |
A22NZ-MPM-NYA |
A22NZ-MPA-NYA |
|
|
Opaque |
White |
A22NZ-MPM-NWA |
A22NZ-MPA-NWA |
|
|
Opaque |
Blue |
A22NZ-MPM-NAA |
A22NZ-MPA-NAA |
|
|
Opaque |
Black |
A22NZ-MPM-NBA |
A22NZ-MPA-NBA |
|
|
Lighted |
Transparent |
Red |
A22NZ-MPM-TRA |
A22NZ-MPA-TRA |
|
Transparent |
Green |
A22NZ-MPM-TGA |
A22NZ-MPA-TGA |
|
|
Transparent |
Yellow |
A22NZ-MPM-TYA |
A22NZ-MPA-TYA |
|
|
Transparent |
White |
A22NZ-MPM-TWA |
A22NZ-MPA-TWA |
|
|
Transparent |
Blue |
A22NZ-MPM-TAA |
A22NZ-MPA-TAA |
|
|
Transparent |
Orange |
A22NZ-MPM-TOA |
A22NZ-MPA-TOA |
|


|
Bezel material and button shape |
Brushed metal, full-guard |
|||
|
|
||||
|
Switch Action |
Momentary |
Alternate |
||
|
Lighted/non-lighted |
Transparency |
Color |
Model |
Model |
|
Non-lighted |
Opaque |
Red |
A22NZ-MGM-NRA |
A22NZ-MGA-NRA |
|
Opaque |
Green |
A22NZ-MGM-NGA |
A22NZ-MGA-NGA |
|
|
Opaque |
Yellow |
A22NZ-MGM-NYA |
A22NZ-MGA-NYA |
|
|
Opaque |
White |
A22NZ-MGM-NWA |
A22NZ-MGA-NWA |
|
|
Opaque |
Blue |
A22NZ-MGM-NAA |
A22NZ-MGA-NAA |
|
|
Opaque |
Black |
A22NZ-MGM-NBA |
A22NZ-MGA-NBA |
|
|
Lighted |
Transparent |
Red |
A22NZ-MGM-TRA |
A22NZ-MGA-TRA |
|
Transparent |
Green |
A22NZ-MGM-TGA |
A22NZ-MGA-TGA |
|
|
Transparent |
Yellow |
A22NZ-MGM-TYA |
A22NZ-MGA-TYA |
|
|
Transparent |
White |
A22NZ-MGM-TWA |
A22NZ-MGA-TWA |
|
|
Transparent |
Blue |
A22NZ-MGM-TAA |
A22NZ-MGA-TAA |
|
|
Transparent |
Orange |
A22NZ-MGM-TOA |
A22NZ-MGA-TOA |
|
|
Bezel material and button shape |
Brushed metal, mushroom |
|||
|
|
||||
|
Switch Action |
Momentary |
Alternate |
||
|
Lighted/non-lighted |
Transparency |
Color |
Model |
Model |
|
Non-lighted |
Opaque |
Red |
A22NZ-MMM-NRA |
A22NZ-MMA-NRA |
|
Opaque |
Green |
A22NZ-MMM-NGA |
A22NZ-MMA-NGA |
|
|
Opaque |
Yellow |
A22NZ-MMM-NYA |
A22NZ-MMA-NYA |
|
|
Opaque |
White |
A22NZ-MMM-NWA |
A22NZ-MMA-NWA |
|
|
Opaque |
Blue |
A22NZ-MMM-NAA |
A22NZ-MMA-NAA |
|
|
Opaque |
Black |
A22NZ-MMM-NBA |
A22NZ-MMA-NBA |
|
|
Lighted |
Transparent |
Red |
A22NZ-MMM-TRA |
A22NZ-MMA-TRA |
|
Transparent |
Green |
A22NZ-MMM-TGA |
A22NZ-MMA-TGA |
|
|
Transparent |
Yellow |
A22NZ-MMM-TYA |
A22NZ-MMA-TYA |
|
|
Transparent |
White |
A22NZ-MMM-TWA |
A22NZ-MMA-TWA |
|
|
Transparent |
Blue |
A22NZ-MMM-TAA |
A22NZ-MMA-TAA |
|
|
Transparent |
Orange |
A22NZ-MMM-TOA |
A22NZ-MMA-TOA |
|


Subassemblies (Common)
Subassemblies
You can order Operation Units, LED Lamps, Mounting Collars, and Contact Blocks individually. Use them in combination for models that are not available as assembled Units. These can also be used as inventory for maintenance parts.
LED Lamps
|
Appearance |
Rated |
Model |
||||
|
Color |
6 VAC/DC |
12 VAC/DC |
24 VAC/DC |
100/110/120 |
200/220/230/ |
|
|
|
Red |
A22NZ-L-RA |
A22NZ-L-RB |
A22NZ-L-RC |
A22NZ-L-RD |
A22NZ-L-RE |
|
Green |
A22NZ-L-GA |
A22NZ-L-GB |
A22NZ-L-GC |
A22NZ-L-GD |
A22NZ-L-GE |
|
|
Yellow |
A22NZ-L-YA |
A22NZ-L-YB |
A22NZ-L-YC |
A22NZ-L-YD |
A22NZ-L-YE |
|
|
White |
A22NZ-L-WA |
A22NZ-L-WB |
A22NZ-L-WC |
A22NZ-L-WD |
A22NZ-L-WE |
|
|
Blue |
A22NZ-L-AA |
A22NZ-L-AB |
A22NZ-L-AC |
A22NZ-L-AD |
A22NZ-L-AE |
|
|
Orange |
A22NZ-L-OA |
A22NZ-L-OB |
A22NZ-L-OC |
A22NZ-L-OD |
A22NZ-L-OE |
|

Mounting Collar
|
Appearance |
Model |
|
|
A22NZ-H-01 |

Contact Blocks
|
Appearance |
Terminals Specifications |
Contacts |
Model |
|
|
Screw terminal block |
SPST-NO (blue) |
A22NZ-S-G1A |
|
SPST-NC (orange) |
A22NZ-S-G1B |
||
|
|
Push-In Plus terminal block |
SPST-NO (blue) |
A22NZ-S-P1A |
|
SPST-NC (red) |
A22NZ-S-P1B |
||
|
|
Push-In Plus terminal block |
DPST-NO (blue) |
A22NZ-S-P2A |
|
DPST-NC (red) |
A22NZ-S-P2B |
||
|
SPST-NO/SPST-NC (white) |
A22NZ-S-P2C |


Lighting Units
|
Appearance |
Terminals Specifications |
Rated voltage |
Model |
|
|
Screw terminal block |
6 VAC/DC |
A22NZ-T-A |
|
12 VAC/DC |
A22NZ-T-B |
||
|
24 VAC/DC |
A22NZ-T-C |
||
|
100/110/120 VAC |
A22NZ-T-D |
||
|
200/220/230/240 VAC |
A22NZ-T-E |
||
|
|
Push-In Plus terminal block |
6 VAC/DC |
A22NZ-T-AP |
|
12 VAC/DC |
A22NZ-T-BP |
||
|
24 VAC/DC |
A22NZ-T-CP |
||
|
100/110/120 VAC |
A22NZ-T-DP |
||
|
200/220/230/240 VAC |
A22NZ-T-EP |

